![]()
How To Check and Test a Marine Battery
It is always good practice to check the level of charge and general condition of your marine batteries, after all, you don’t want to arrive at the water only to discover you have no power! On many boats or watercraft the voltage can be checked using your on board battery control panel. If you don’t have one or there is a problem then you can use a voltmeter or multi-meter.
Here we will help you understand how to check the charge in your marine battery using a multi-meter or voltmeter and what other helpful checks you can carry out.
How Many Volts Should a Marine Battery Have?
A good healthy marine battery should register between 12.6 to 12.7 volts. Due to the way batteries discharge it’s very important that you test the batteries after they have been sitting (not on charge, or being charged through a boat or watercraft’s split charging system) for at least an hour, in order to get the resting voltage of the battery. Testing the batteries just after they’ve been on charge, or being charged through a running boat or watercraft will give an inaccurate reading! The best option would be to leave your boat or watercraft overnight (turning all systems off) and test the batteries the next morning before you start the boat or watercraft or charging the batteries again, this would accurately gauge the health of your battery.
Many batteries are located in the engine bay, however some manufacturers may have located the batteries elsewhere, if it’s not obvious to you then please consult the owner’s manual. It is possible that the batteries could be encased in a plastic box, shroud or cover, these will either unclip, lift off or sometimes require unfastening some bolts or screws. Once you can see the batteries you may find that the positive terminal has a red cover, this will lift off or pull back to expose the terminal below, you could find a black cover on the negative terminal in some cases, again this should pull back or lift off.
Once both the batteries terminals are exposed be extremely careful not touch both of the terminals with anything metal, this will cause a short circuit!
How To Test a Marine Battery With a Multimeter
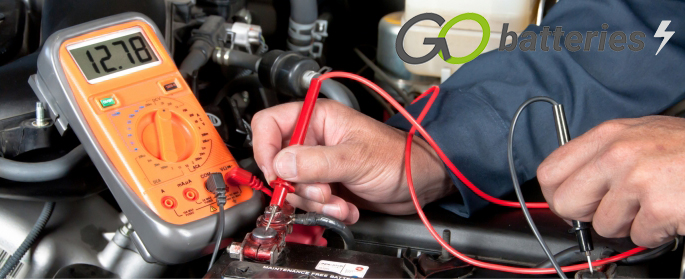
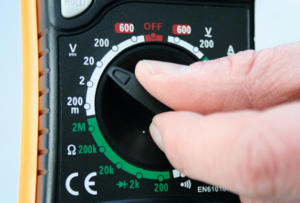
You will first want to make sure you have your multi-meter (also known as a digital voltmeter) correctly to measure DC voltage, this is indicated with a dashed line and a solid line and above a letter V. You need to have the dial set to 20 which will accurately measure between 0-20 volts. If the reading blinks when it’s not attached to anything, you may need to replace the multi-meter’s internal battery.

Take the red probe and place this on the positive terminal of the battery, the positive terminal is usually marked red and carries a + symbol. Taking the black probe and likewise place this on the negative terminal of the battery, the negative terminal of the battery is usually marked black and carries a – symbol. The reading for a fully charged battery should read 12.6 to 12.7 volts, some AGM batteries can be 12.8 volts, if you have a reading which is showing -12.6 or -12.7 then you have the probes the wrong way round.
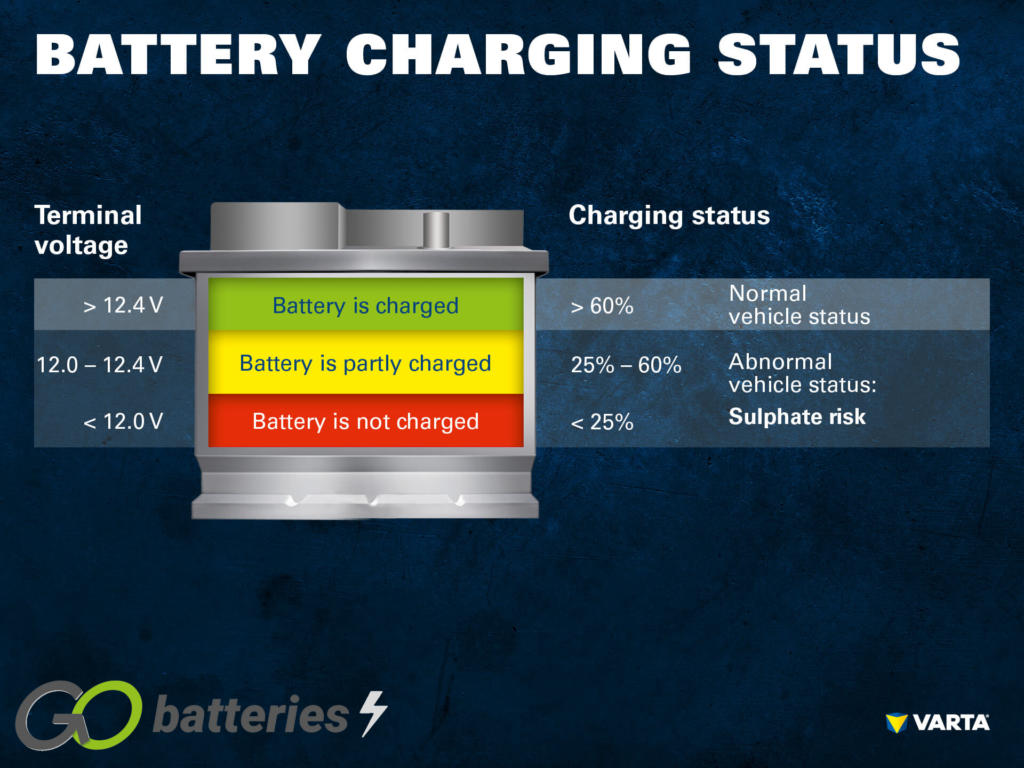
As mentioned previously, a fully charged battery is 12.6 to 12.7 volts and the resting voltage, ideally should be no lower than this. But how does that help us define a half charged or even flat battery? A rule of thumb is that a battery reading 12.4 volts is half charged and a battery reading of 12.2 volts is flat, there are occasions where a boat or watercraft’s starting battery may start at 12.2 volts but this would be rare and you are at a dangerous level where your boat or watercraft will suddenly not start! This is something to avoid at all costs as having a boat or watercraft not start once you are out on the water can bring many problems, and potentially place you in danger. Below 12 volts is classed as discharged and the lower the voltage drops is deep discharge and sulphation will occur.
More modern boats or watercraft may experience ‘parasitic loss’ which is essentially when your boats electrical system continues to pull energy from the battery, even when the key is entirely turned off. This is over and above leaving your lights on or a none essential appliance draining your battery. Instead, ‘parasitic loss’ is when everything is turned off and electricity still continues to drain from the battery. This can be for many reasons and caused by electrical components and monitoring systems such as computers, bilge pumps, Carbon monoxide detectors, internal clocks, alarm, marine stereos saved settings and more besides, this is known as parasitic drain.

If your boat or watercraft is being used daily and the journey is of reasonable length or you are on mains hookup then these effects are kept to a minimum. However if your boat or watercraft is used infrequently or for many short journeys and you haven’t charged your batteries recently, then the amount of electrical energy pulled from this process goes beyond the normal range, it becomes a problem that may affect your batteries performance and ultimately their service life.
If you are concerned this is occurring then fully charge your battery on an appropriate battery charger and then test the battery after resting the battery overnight. If you are planning on storing the boat out of the water you can either disconnect the battery, or remove it entirely from the boat. If you are storing the boat or watercraft on the water for a period of time, then it is very important to make sure you have the correct power facilities in order to keep the vessel safe during storage.
How To Test The Alternator With a Multimeter
It’s important to mention that the alternators job is to produce electricity and charge the battery, this needs to be done so the boat or vessel has sufficient charge to start the motor next time. Whilst the motor or motors are running the alternator or charging system takes on the role of delivering power to the vessels electrical systems and also supplying charge to the batteries. It is important to remember that if you have deeply discharged batteries, the alternator or charging system alone will not be able to fully charge your batteries, this can only be achieved by charging the batteries on a battery charger.
In order to check the alternator or charging system is supplying the correct amount of charge, with the engine or engines running, place the probes of your multi-meter (as previously mentioned above) on the battery terminals. A healthy charging system should give the results of between 13.6 volts and 14.4 volts at idle tick over.
If you have a reading below 13.6 volts then the charging system isn’t supplying the power required in order to keep the vessels electrical systems running and your batteries charged, ready for your next start. This is where resulting flat or discharged batteries can occur and simply replacing the batteries will not cure the problem. Similarly, having a reading above 14.4 volts is over-charging the batteries and effectively cooking them, which in turn will boil away the electrolyte. Whether your alternator or charging system is under-charging or over-charging, either will great reduce the battery life and need a professional to investigate and remedy the issue.
Checking The Charge Level
Most modern boats or watercraft have a built-in battery monitor, however some of the older models may not. We recommend checking your battery charge levels with a voltmeter or multi-meter, below we have a quick reference chart to assist your checks.
Prior to taking the readings, ensure all electrical appliances and systems are switched off.
Meter Reading Approximate Charge Level
12.7V or above 100%
12.5V 75%
12.4V 50%
12.2V 25%
12V or less Discharged